This guide explains how to view, create, and manage appointments in Pool Office Manager (POM) using the Schedule module.
Accessing the Schedule
Click Schedule in the left sidebar to open the scheduling interface. POM offers four different views to manage your appointments.
Schedule Views
SCHEDULE (Gantt View): The default view showing a timeline of appointments by technician. Each row represents a technician with their appointments displayed across a timeline organized by hour. Color-coded bars indicate different service types and priorities. A "2 workers" badge appears on jobs requiring multiple technicians.
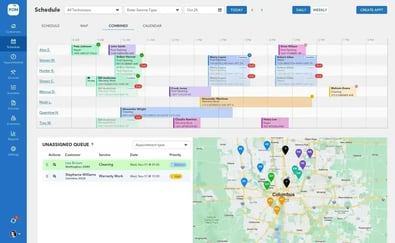
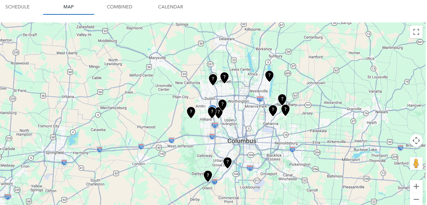
MAP View: Geographic view displaying customer locations on a map with routing capabilities. Useful for optimizing daily routes and visualizing service areas.
COMBINED View: Shows both the Schedule and Map together on a split screen for comprehensive dispatch planning.
CALENDAR View: Traditional calendar format showing appointments by day, week, or month.
Creating an Appointment
Click the Create appointment button in the top right of the Schedule page. Fill in the required details including customer, service type, date/time, duration, and assigned technician. Set the priority level (Normal, Special, etc.) which affects color coding on the schedule.
Using the Gantt Schedule
The Gantt view shows technicians listed on the left with their daily appointment counts. The timeline displays appointments as colored bars across the workday. Donut charts show each technician's completion progress.
Filter appointments by Job type or Workers using the dropdown menus. Navigate dates using the arrow buttons or click Today to jump to the current date. Use the View dropdown to switch between Daily and Weekly displays. Export appointment data using the Export CSV option.
Managing the Unassigned Queue
Appointments without assigned technicians appear in the Unassigned Queue below the main schedule. Filter the queue by appointment type. View columns include Actions, Customer, Service, Date, and Priority. Drag appointments from the queue to assign them to technicians on the schedule.
Appointment Presets
When creating appointments, POM uses presets defined in your Service Types settings. These presets automatically fill in duration, priority, color, billing status, default workers, and inventory items. This speeds up appointment creation and ensures consistency.
Filtering and Searching
Use the filter dropdowns to view specific job types or workers only. The date navigation lets you quickly move between days or weeks. For finding specific appointments, use the Appointment list view from the left sidebar which offers additional search and filter options.
⚠️ Deleting an appointment is permanent. Deleted appointments cannot be recovered — there is no undo or trash bin. If a visit isn't happening, unassign or reschedule it instead of deleting it, so the history stays on the customer's record.
Creating an Appointment from a Customer Profile
Video: Watch the walkthrough
- Open the customer's profile and click Appointment (or click Create Appointment from the Schedule or Appointment pages).
- Fill in the mandatory fields — customer and service type.
- Add extras as needed: technician, time, duration, inventory items, notes.
- Change the frequency to make it recurring (see Set Up and Edit Recurring Appointments).
- Modify billing if needed, then Save.
Appointment Defaults
Under Settings > Service Types, each service type's Appointment Presets can prefill standard options — duration, color, billing details, items, and notes — so new appointments start correctly by default. (See Service Types & Service Report Templates.)
Emailing or Texting the Appointment to the Customer
- When viewing an appointment, use the Email (or text) button to send it to the customer.
- To send many at once, select multiple appointments on the Appointment List page and email in bulk.
- Emails send from your company service email with your logo, and include any customer notes saved on the appointment.
Related: Sending Appointment Notifications