POM doesn't connect to QuickBooks Desktop directly. Instead, you export your services or invoices from POM as a file, then use Zed Axis, a third-party import tool, to bring them into QuickBooks as invoices. Once Zed Axis is set up (a one-time job), a batch takes a couple of minutes: export in POM, import in Zed Axis, check in QuickBooks.
Two short videos show the whole thing: the first is the POM side, the second is Zed Axis.
Watch: creating invoices in POM and exporting them for QuickBooks Desktop (2 min).
Watch: connecting Zed Axis to QuickBooks and importing the file (2 min).
Before you start
- QuickBooks Desktop open on the same computer, with your company file loaded and you signed in as an Administrator (the first connection needs admin rights).
- Zed Axis installed. Download it from zed-systems.com — the Import edition is all you need, and there's a free trial. When you buy, use POM's partner discount code ZPP-16-D20PC.
- The POM mapping file that matches your Zed Axis version (see below). Save it somewhere you can find again, like your desktop.
Mapping file downloads
The mapping file tells Zed Axis which column in the POM export goes to which QuickBooks field. Download the one for the Zed Axis version you have installed (the version is in the title bar of the Zed Axis window). These are the same files as on poolofficemanager.com/quickbooks-desktop-mapping.
| Zed Axis version | Mapping file |
|---|---|
| 2025 | QB Desktop Mapping 2025.xml |
| 2024 (18.1) | QB Mapping 2024-1.xml |
| 18.0 | QB Mapping 2024 File.zip — unzip it first; the mapping is the XML file inside. |
If your browser opens the XML file as text instead of downloading it, right-click the link and choose Save link as….
Step 1 — Export from POM
There are two places to export from. Use whichever matches how you work.
From the Billing page (raw services, no review)
- Open Billing, set the date range, and tick the customers whose services you want to send. Select all grabs everyone in the list.
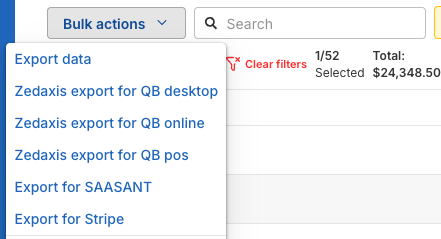
- Click Bulk actions → Zedaxis export for QB desktop.
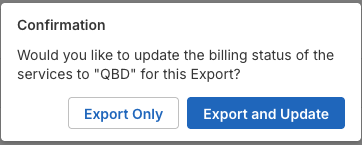
- POM asks whether to update the services' billing status to QBD. Choose Export and Update if you're sending these invoices — it marks the services as sent to QuickBooks Desktop so you don't export them twice. Export Only leaves the status alone.
From the Invoicing page (invoices you've reviewed)
- On the Billing page, click Create invoice on a customer, review and adjust the invoice, and save it under the Local tab (Save Locally).
- Open Invoicing, tick the draft invoices you want to send, and click Bulk actions → Export for QuickBooks Desktop. The invoices are marked Exported.

Get the file
Either way, POM runs the export as a bulk operation and takes you to Bulk Ops. When the row shows Completed, click the download icon on the right to save the file. It's a spreadsheet (CSV) with one row per service line.

Step 2 — Connect Zed Axis to QuickBooks
- Open QuickBooks Desktop and sign in to your company file.
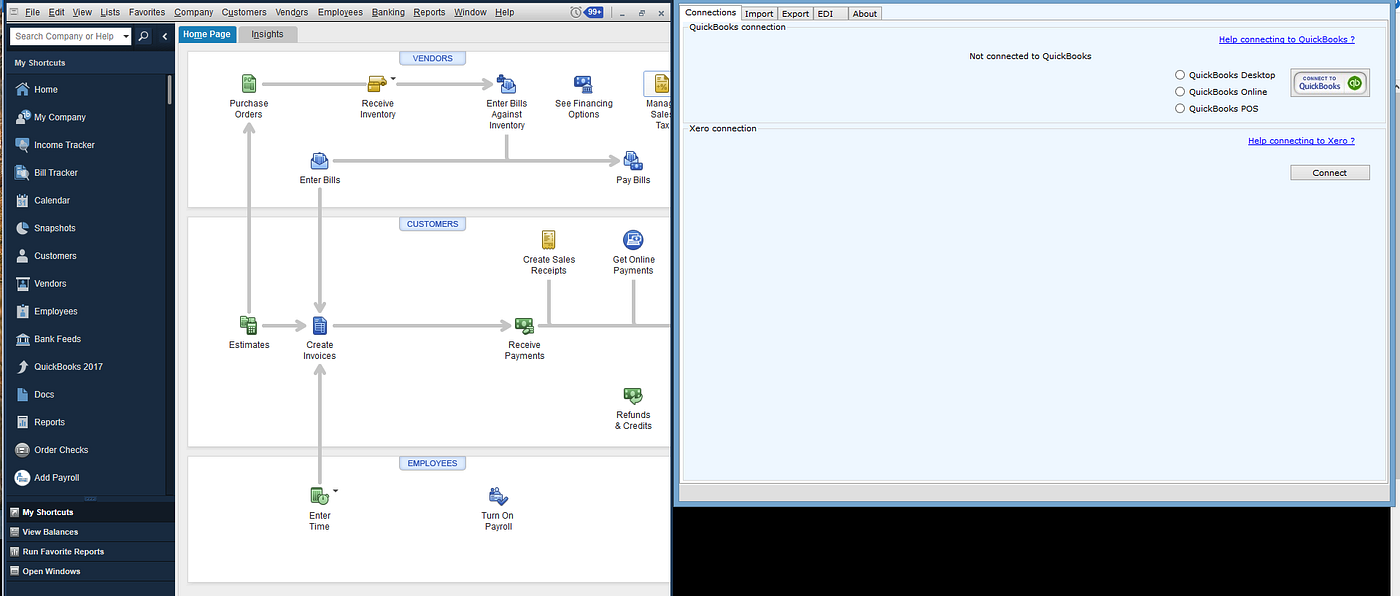
- Open Zed Axis. It helps to have QuickBooks on one side of the screen and Zed Axis on the other.
- On the Connections tab, select QuickBooks Desktop and click Connect to QuickBooks.
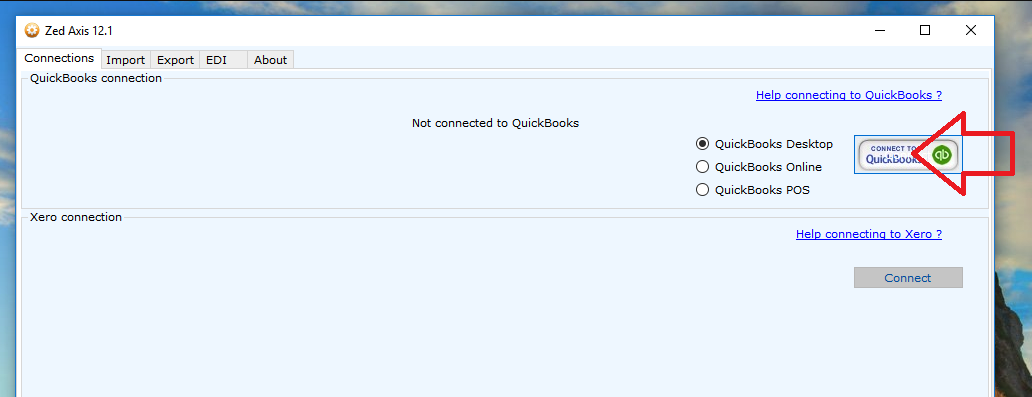
First time only: QuickBooks pops up a window asking you to let Zed Axis read and change your company file. You have to be signed in as an Administrator to approve it, and you only approve once. See Permission for ZedAxis to use QuickBooks for the exact prompt.
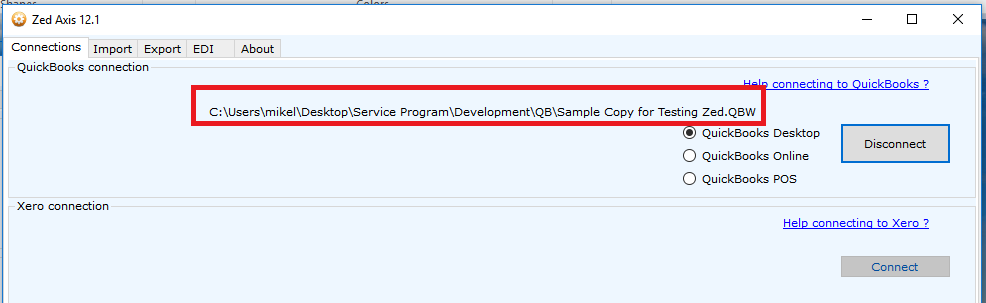
When it's connected, the Connections tab shows the path to your company file and the button changes to Disconnect.
Step 3 — Load the POM mapping (first time only)
The mapping tells Zed Axis which column in the POM file goes to which field in QuickBooks. You import it once; after that it's in the dropdown every time.
- Click the Import tab.
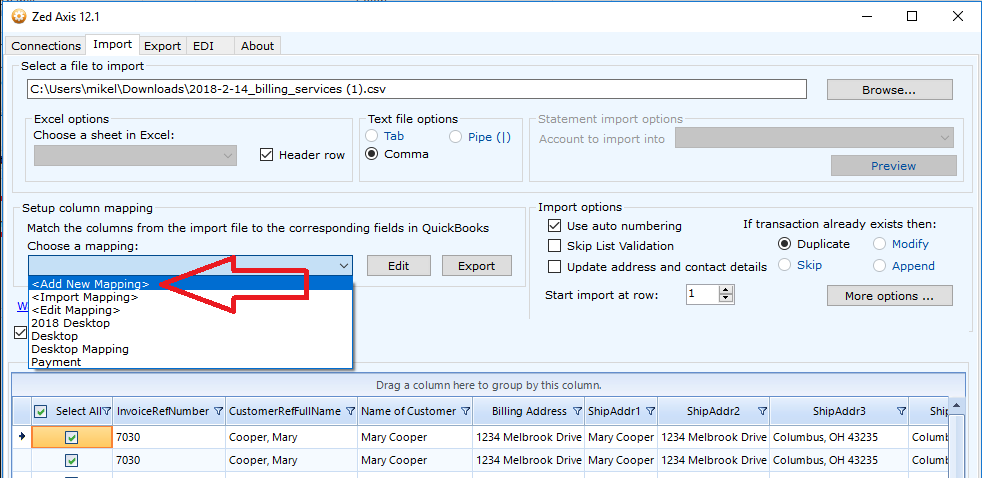
- Under Setup column mapping, open the Choose a mapping dropdown and pick <Import Mapping>.
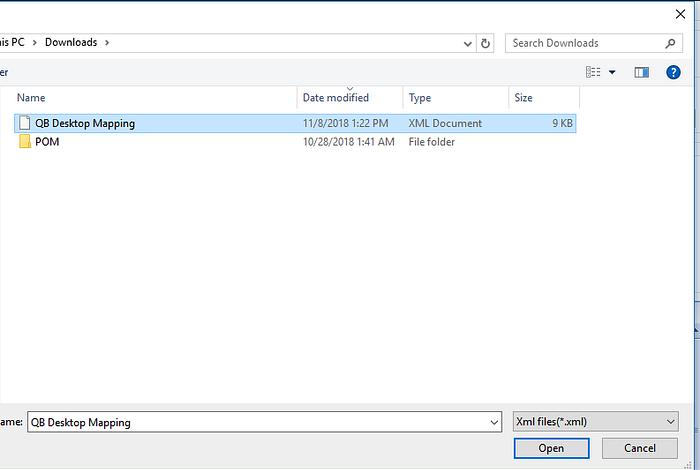
- Choose the mapping file you downloaded from POM (QB Desktop Mapping, an XML file) and click Open. If you can't see it in the file picker, drag it out of your Downloads folder onto the desktop and try again.
- Open the dropdown again and select QB Desktop Mapping.
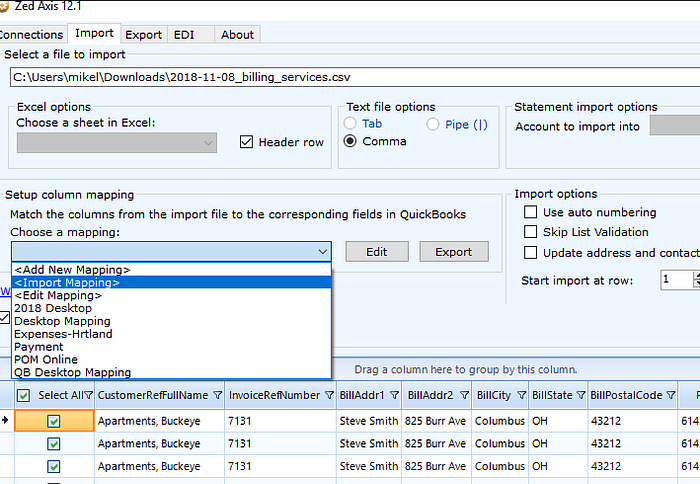
Zed Axis doesn't confirm that the mapping imported — the only sign is that QB Desktop Mapping now appears in the list. If you get an error, you've probably imported it twice; just pick the one that's there.
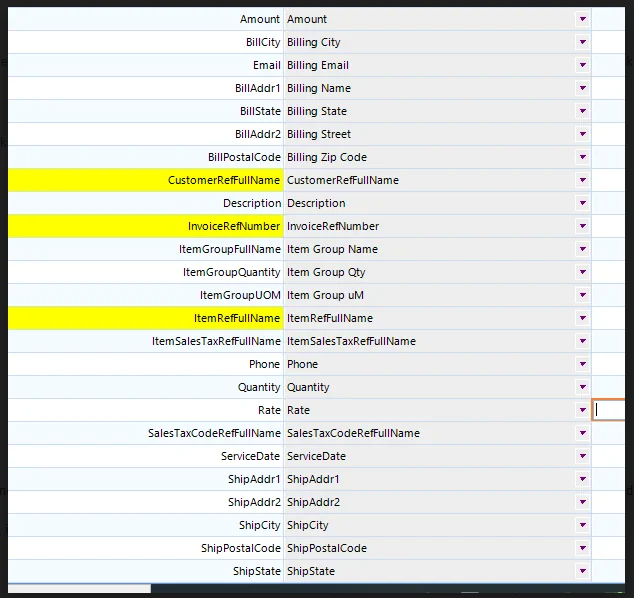
If the import won't work at all, you can build the mapping by hand with <Add New Mapping> and match the columns like this (the three highlighted ones are the ones that matter most):
Step 4 — Import the file
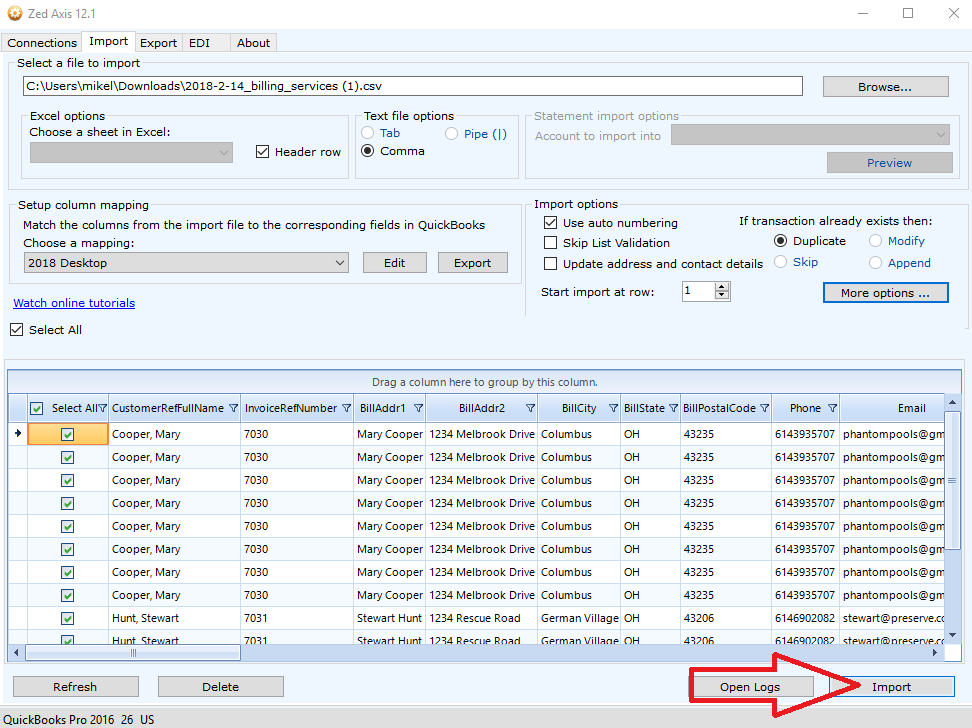
- On the Import tab, click Browse and open the file you downloaded from POM. Its rows appear in the grid at the bottom.
- Make sure QB Desktop Mapping is selected under Choose a mapping.
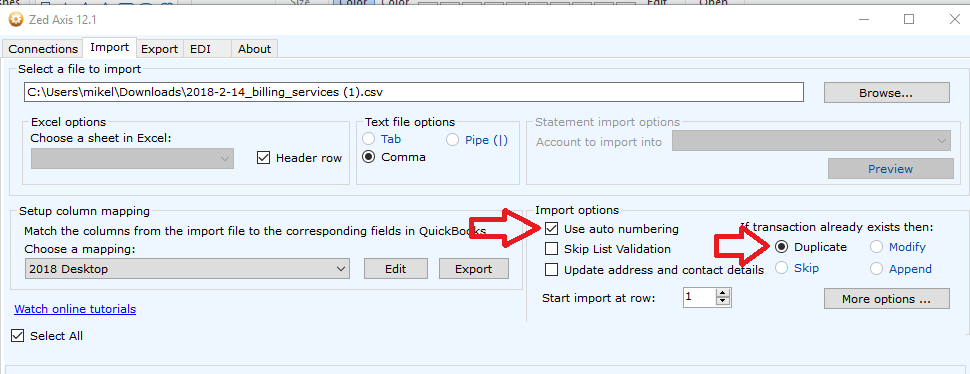
- Under Import options, tick Use auto numbering and make sure Duplicate is selected under "If transaction already exists."
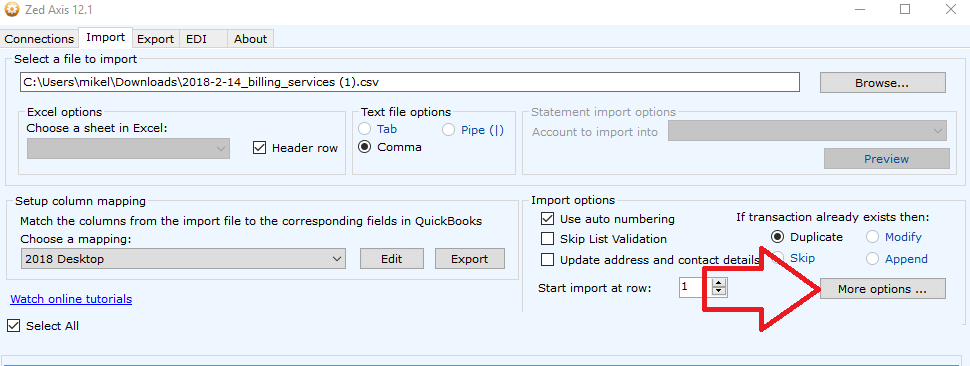
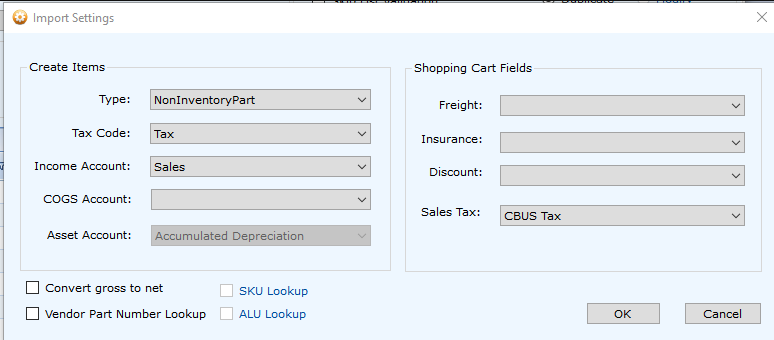
- Click More options… to check how new items are created. Any item on a POM invoice that doesn't exist in QuickBooks yet is created automatically using these defaults. Set Type to Non-Inventory Part or Service, pick the income account and tax code you want, and click OK. You can always change an item's type or account later in QuickBooks.
- Click Import (bottom right).
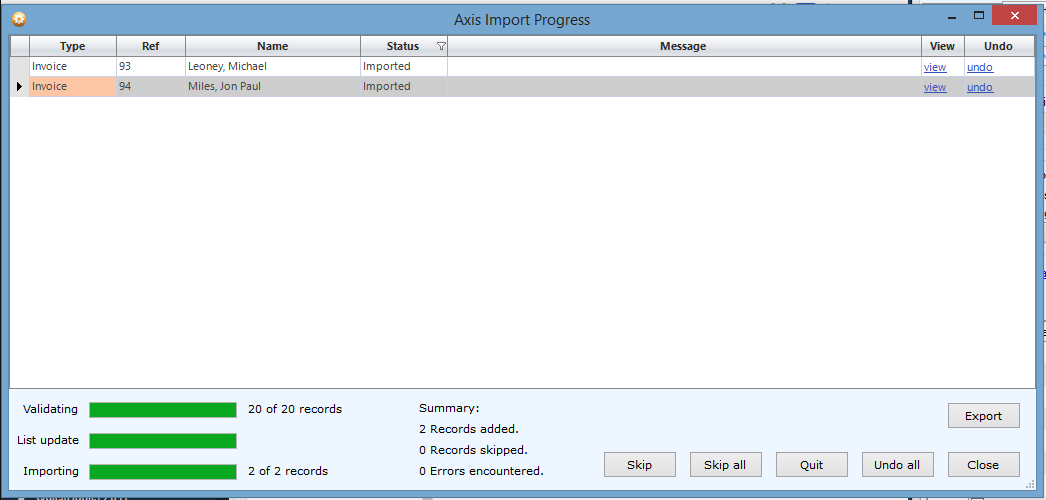
- When it finishes, read the Summary: records added, skipped, and any errors. Each line has a view link that opens the invoice in QuickBooks, and undo if something's wrong.
Step 5 — Check QuickBooks
Open the invoice in QuickBooks (view in the summary, or Customers → Create Invoices and find it). You should see the customer, the items and the service date from POM. If the customer already exists in QuickBooks the invoice lands on their account; if not, Zed Axis creates the customer. From here you print or email the invoice the way you normally do.
When you're done, go back to the Zed Axis Connections tab and click Disconnect.
If something goes wrong
- Zed Axis crashes or won't open — see ZedAxis — Crashing Error.
- QuickBooks won't let Zed Axis connect — you're not signed in as an Administrator, or the permission was declined. See Permission for ZedAxis to use QuickBooks.
- Columns land in the wrong fields — the wrong mapping is selected, or the mapping file doesn't match your Zed Axis version. Re-download the right one from the table under Before you start and import it again.
- Duplicate invoices in QuickBooks — the same services were exported twice. Use Export and Update on the Billing page so sent services are marked QBD, and filter them out next time.
Still need a hand? Email help@poolofficemanager.com or call 614-710-0074.